

Get Started
Before proceeding, this guide uses the memo command-line tool with a terminal window. You don’t need to be a UNIX guru but you should be familiar with typing shell commands and interpreting outputs.
The following is written for users of Linux. If you are not using this platform, please refer to the macOS guide.
Choose a platform
Install Software
Get the latest memo image from Docker:
$> docker run --rm -it infinit/memo bash
Note: The memo image runs on Ubuntu.
Now that you have run a container, let us test that memo is working as expected:
Container A$> memo --version
0.9.2
If you are using Ubuntu 14.04 or later, you can use our repository to install the command-line tool (recommended). Otherwise, choose the Tarball Install.
First import the public key used by the package management system:
$> sudo apt-key adv --keyserver keyserver.ubuntu.com --recv-keys 3D2C3B0B
...
gpg: key 6821EB43: public key "Infinit <contact@infinit.sh>" imported
Ensure that you have the add-apt-repository command and apt-transport-https installed:
$> sudo apt-get install software-properties-common apt-transport-https
Reading package lists... Done
Building dependency tree
Reading state information... Done
software-properties-common is already the newest version.
0 upgraded, 0 newly installed, 0 to remove and 0 not upgraded.
Then add the repository locally:
$> sudo add-apt-repository "deb https://debian.infinit.sh/ trusty main"
Finally, you can update your local list of packages and install the command-line tool as you would any other package:
$> sudo apt-get update
$> sudo apt-get install memo
...
Unpacking memo (0.8.0)...
Setting up memo (0.8.0)...
The binaries can then be found in /opt/memo/bin.
First intall yum utilities:
$> sudo yum install yum-utils
Then add the repository locally:
$> sudo yum-config-manager --add-repo https://yum.infinit.sh/infinit.repoFinally, just install memo:
$> sudo yum install memo
Now that you’ve installed the command-line tool, take a look at what's included. The install contains the following subdirectories:
$> cd /opt/memo
$> ls
bin/ lib/ share/Next, open your terminal and extract the memo tarball:
$> tar xjvf memo-x86_64-linux_debian_oldstable-gcc4-0.9.2.tbz
memo-x86_64-linux_debian_oldstable-gcc4-0.9.2/
memo-x86_64-linux_debian_oldstable-gcc4-0.9.2/bin/
memo-x86_64-linux_debian_oldstable-gcc4-0.9.2/lib
...
memo-x86_64-linux_debian_oldstable-gcc4-0.9.2/bin/memo
...
$> tar xjvf memo-x86_64-alpine-gcc-0.9.2.tbz
memo-x86_64-alpine-gcc-0.9.2/
memo-x86_64-alpine-gcc-0.9.2/bin/
memo-x86_64-alpine-gcc-0.9.2/lib
...
memo-x86_64-alpine-gcc-0.9.2/bin/memo
...$> tar xjvf memo-arm-0.9.2.tar.gz
memo-arm-0.9.2/
memo-arm-0.9.2/bin/
memo-arm-0.9.2/lib
...
memo-arm-0.9.2/bin/memo
...Now that you’ve extracted the tarball, take a look. The extracted directory contains the following subdirectories:
$> cd memo-x86_64-linux_debian_oldstable-gcc4-0.9.2/
$> ls
bin/    lib/    share/
$> cd memo-x86_64-alpine-gcc-0.9.2/
$> ls
bin/ lib/ share/$> cd memo-arm-0.9.2/
$> ls
bin/ lib/ share/- The
bin/subdirectory contains the actual memo binary memo. - The
lib/subdirectory contains all the libraries the above binaries depend upon to operate (excluding the FUSE library you installed earlier). - The
share/subdirectory contains additional information such as the open source software licenses etc..
Deploy Cluster
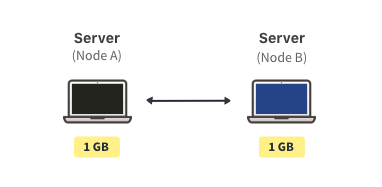
It is now time for you to create and deploy a storage cluster. What follows is a step-by-step guide to set up a storage cluster composed of several servers (named A, B etc.), each contributing storage capacity to create a virtual storage pool.
First, add the bin/ directory to the PATH environment variable to be able to invoke the command-line tool from anywhere:
$> export PATH=$PWD/bin/:$PATHCreate a user
The first step consists in creating a user. This user will be the administrator responsible for deploying the storage cluster but also for issuing requests to the key-value store. All the commands that follow use the user name alice but you can obviously pick your own user name:
Node A$> memo user create --name alice --fullname "Alice"
Generating RSA keypair.
Locally saved identity for user "alice".
Create a silo
A silo represents an inherently unreliable storage resource. Servers can have one or more silos to store the data blocks. memo is completely agnostic of the nature of such silos.
Next, we are going to declare a silo. The mode memo silo is used to that effect while the option filesystem specifies that the data blocks will be stored on the local file system, represented as files organized in a directory e.g /var/storage/memo/.
Node A$> memo silo create filesystem --name local --capacity 1GB
Locally saved silo "local".
Create a value store
Now that we have at least one server contributing storage capacity (through a silo), we can create a value store, interconnecting different servers and aggregating their storage resources into a virtual storage pool.
The memo network command creates the value store, specifying a name along with the list of silos the current server should use. In this example, only the local silo, previously created, is used but you could plug as many as you would like. Obviously, you need to substitute alice with your username:
Node A$> memo network create --name my-network --silo local --as alice
Locally linked network descriptor "alice/my-network".
Locally saved network descriptor "alice/my-network".
Create a key-value store
The memo kvs mode is used to create a key-value store on top of an existing value store, referred through the --network option.
Node A$> memo kvs create --name my-kvs --network my-network --as alice
Locally saved kvs descriptor "alice/kvs".
Run the stores
Finally, we can run the value and key-value stores (along with the underlying value store) that will also expose a communication channel using the --grpc option. The --port option specifies on which port the server should listen to for other servers to connect.
Node A$> memo kvs run --name my-kvs --grpc 0.0.0.0:13120 --port 9997 --allow-root-creation --as alice &
Running key-value store "alice/my-kvs".
[...]
Scale the cluster
Now that you we successfully created and deployed a single-server cluster, let us scale it out by adding new servers. If you don’t have other machines at your disposal, you can simulate another host through the use of the MEMO_HOME environment variable by setting it to an empty directory to store the configuration files of this new virtual host.
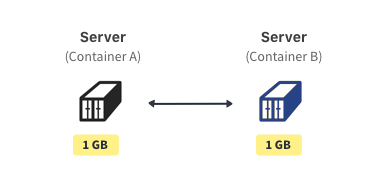
Now that you have successfully created and deployed a single-server cluster, let us scale it out by adding new hosts. To do that, all you have to do is run another container as done earlier during the installation procedure.
Transfer the identity/descriptors
In order for another host (virtual or not, running in a container or not etc.) to connect to the storage cluster, it needs to have access to some of the configuration files that have been generated on server A.
There are different types of configuration files: from the user identity which is as sensitive as a private SSH key and other configuration files such as the network and key-value store descriptors which contain configuration parameters and more.
Next, we will export the configurations in a JSON representation (referred to as identity for the user and descriptors for the other objects) which can then be stored in a file and transferred over the network to another device for instance. First, let us come back to server A and export the user identity along with the network and key-value store descriptors.
Node A$> memo user export alice --full --output /tmp/alice.json
WARNING: you are exporting the user "alice" including the private key
WARNING: anyone in possession of this information can impersonate that user
WARNING: if you mean to export your user for someone else, remove the --full

$> memo network export --name my-network --as alice --output /tmp/my-network.json
Exported network "alice/my-network".

$> memo kvs export --name my-kvs --as alice --output /tmp/my-kvs.json
Exported key-value store "alice/my-kvs".
NOTE: The --full option exports both the pull and private parts of the user's identity. As such, the output is extremely sensitive and should never be shared with anyone.
Now let us move to server B. First, you need to download, install and configure the memo command-line tool on this new device, see Install Software. Then, the previously exported files can be imported back on the new host B:
Node B$> memo user import --input /tmp/alice.json
Locally saved identity for user "alice".
Imported user "alice".

$> memo network import --as alice --input /tmp/my-network.json
Locally saved network descriptor "alice/my-network".
Imported network "alice/my-network".

$> memo kvs import --as alice --input /tmp/my-kvs.json
Locally saved key-value store "alice/my-kvs".
Imported key-value store "alice/my-kvs"
Connect and run the server
It is now time to have server B join the storage cluster. To that end, we first need to define a silo for the server to host some of the replicas the system manages so as to contribute to ensuring redundancy. Once the silo created, server B can be linked to the cluster, contributing the storage capacity represented by host B's local silo.
Node B$> memo silo create filesystem --name local --capacity 1GB
Created silo "local".

$> memo network link --silo local --name my-network --as alice
Locally linked network descriptor "alice/my-network".
Linked device to network "alice/my-network".
Finally, the key-value store can be run (along with the value store). In practice this step will connect to the other servers composing the storage cluster. Make sure to use the --peer option to specify the IP address and port of at least one other host in the cluster.
Node B$> memo kvs run --name my-kvs --grpc 0.0.0.0:13121 --port 9998 --peer 127.0.0.1:9997 --as alice &
Running key-value store "alice/my-kvs".
[...]
NOTE: If you are simulating hosts on the same machine, make sure to use a different port through the --port option.
Repeat...
You can repeat the previous steps as many times as you want in order to scale out your cluster.
Use API
We now have a fully operational key-value store running on top of a value store aggregating storage capacities from a cluster of servers. Next, we will show how to interact with the API. But first, we need to generate function stubs that we provide you with a piece of code (package, module, header etc.) in your favorite language to easily interact with the API.
Generate Stubs
memo exposes a gRPC API, offering a portable and language-agnostic channel of interaction. gRPC relies on Protocol Buffers (protobuf) to serialize the remote procedure calls' (RPC) messages. The protocol format and the list of RPCs is described in a simple .proto file.
As a client, you need to download memo's official memo_kvs.proto file for interacting with the key-value store API. You then have to generate the package/module/header/class (depending on the language or your choice) that will provide you with functions to easily call the RPCs.
NOTE: In C++, you will need to build the gRPC plugin for protoc. A clear procedure is given by the gRPC website.
$> go get -u github.com/golang/protobuf/protoc-gen-go
$> export KVS_PROTO_OUT=$GOPATH/src/google.golang.org/grpc/memo/kvs
$> mkdir -p $KVS_PROTO_OUT
$> protoc --proto_path=$HOME/Downloads --go_out=plugins=grpc:$KVS_PROTO_OUT $HOME/Downloads/memo_kvs.proto
$> ls $KVS_PROTO_OUT
memo_kvs.pb.go
$> export KVS_PROTO_OUT=$HOME/projects/memo/src
$> mkdir -p $KVS_PROTO_OUT
$> protoc --proto_path=$HOME/Downloads --cpp_out=$KVS_PROTO_OUT --plugin=protoc-gen-grpc=$(whereis grpc_cpp_plugin) --grpc_out=$KVS_PROTO_OUT $HOME/Downloads/memo_kvs.proto
$> ls -lx $KVS_PROTO_OUT
memo_kvs.grpc.pb.cc memo_kvs.grpc.pb.h memo_kvs.pb.cc memo_kvs.pb.h$> python3 -m pip install grpcio grpcio-tools
$> export KVS_PROTO_OUT=$HOME/projects/memo/src
$> mkdir -p $KVS_PROTO_OUT
$> python3 -m grpc_tools.protoc --proto_path=$HOME/Downloads --python_out=$KVS_PROTO_OUT --grpc_python_out=$KVS_PROTO_OUT $HOME/Downloads/memo_kvs.proto
$> ls -lx $KVS_PROTO_OUT
memo_kvs_pb2_grpc.py memo_kvs_pb2.pyExample
Let us interact with the key-value store's API by writing a short Python example:
import grpc
import memo_kvs_pb2_grpc
import memo_kvs_pb2 as kvs

channel = grpc.insecure_channel('127.0.0.1:13120')
store = memo_kvs_pb2_grpc.KeyValueStoreStub(channel)

store.Insert(kvs.InsertRequest(key = 'foo', value = 'bar'.encode('utf-8')))
store.Update(kvs.UpdateRequest(key = 'foo', value = 'baz'.encode('utf-8')))

response = store.Fetch(kvs.FetchRequest(key = 'foo')).value.decode('utf-8')
print(response)
NOTE: Alternatively, you can run a Docker image built to that effect: $> docker run --rm -it infinit/memo-pyton:0.8.0 172.17.0.1:13120
Clean Environment
Remember that, through this guide, you have created some objects of sensitive nature that you may not want to lose. The most important one is the user identity which contains a critical RSA key pair.
Before shutting down your containers, erasing your configuration files or else, take care to export and safely store that information through memo user export for instance.
Diagnose Problems
The memo doctor binary analyzes the environment to detect inconsistencies and common issues for you to quickly understand why memo may not be behaving as expected. Issues may range from incorrect permissions on some files/directories, to a router blocking UDP packets and more. The easiest way to run memo doctor is to use the all mode so as to analyze the operarting system, environment variables, networking capabilities, configuration files etc.
$> memo doctor all
CONFIGURATION INTEGRITY:
[OK] Silos
[OK] Networks
[OK] Leftovers

SYSTEM SANITY:
[OK] Username
[OK] Space left
[OK] Environment
[OK] Permissions

CONNECTIVITY:
[OK] Connection to https://beyond.infinit.sh
[OK] Local interfaces
[OK] NAT
[OK] Protocols
Go Further
You can now go further by having a look at the API or CLI references.
If you have any question and/or feedback, please do not hesitate to reach out to us, we're never too far away:

Talk to us on the Internet!
Ask questions to our team or our contributors, get involved in the project...